
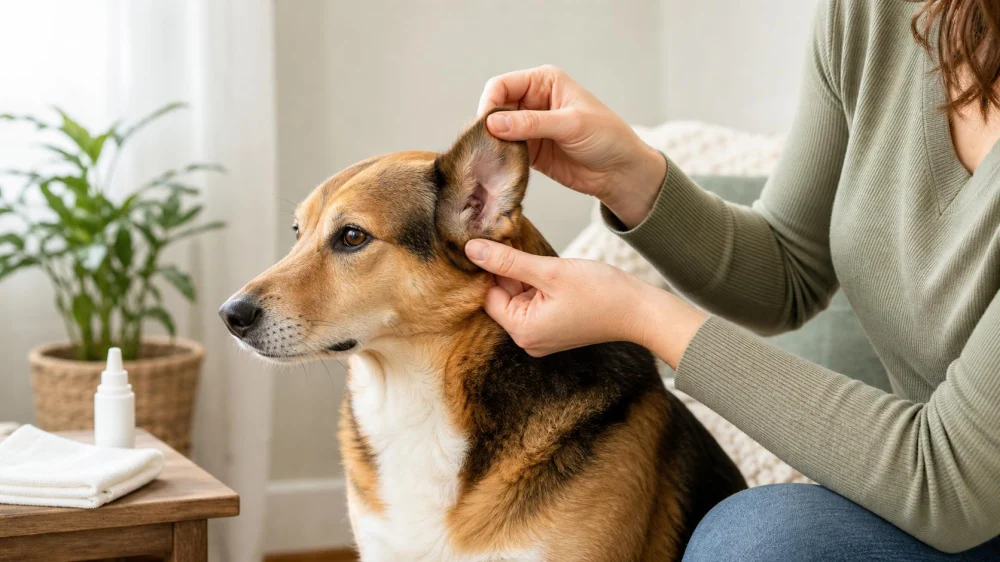
Pet Ear Odor: What to Check Before You Start Cleaning
On this page
- Quick answer
- What ear odor can and cannot tell you
- Check for urgent warning signs
- Make a useful observation record
- Decide whether to clean or wait
- Follow a veterinarian-approved cleaning routine
- Avoid common ear-care mistakes
- Prepare for a veterinary appointment
- Ear-odor checklist
- Limitations and important notes
- Sources and evidence notes
- Frequently asked questions
- Conclusion and next steps
Quick answer
A new or strong odor from a pet’s ear is a reason to inspect, not a diagnosis. Check for pain, redness, swelling, discharge, scratching, head shaking, hearing changes, or loss of balance. Do not put cleaner or medication into a painful or abnormal ear until a veterinarian confirms the eardrum and ear canal can be treated safely.
What ear odor can and cannot tell you
Ear odor is a noticeable smell arising from material or inflammation around the outer ear or ear canal. Wax, moisture, skin debris, foreign material, bacteria, yeast, parasites, allergy-related inflammation, a wound, or another condition may contribute. Smell alone cannot identify which cause is present.
Normal appearance and odor vary among dogs, cats, rabbits, and other companion animals. Ear shape, hair, swimming, grooming, skin disease, and previous ear problems also affect risk. Advice for one species or one pet should not automatically be used for another.
This guide helps pet owners in the United States collect useful information and avoid unsafe cleaning. It does not diagnose infection or replace an examination of the canal and eardrum.
Check for urgent warning signs
Contact a veterinary clinic promptly when ear odor occurs with significant pain, bleeding, pus-like discharge, marked swelling, a wound, suspected foreign object, or a suddenly swollen ear flap. Do not keep manipulating an ear that makes the pet cry, snap, hide, or pull away.
Seek urgent veterinary guidance for a head tilt, stumbling, circling, abnormal eye movement, vomiting with balance problems, sudden hearing change, facial weakness, collapse, or severe illness. These signs can involve more than routine outer-ear debris.
If a chemical, medication, plant material, or household substance entered the ear, call a veterinarian or appropriate animal poison resource with the product information. Do not try to neutralize a substance or flush deeply unless a professional directs you.
Make a useful observation record
- Compare both ears. Note whether the change is on one side or both.
- Describe the timing. Record when the odor started and whether it is constant, intermittent, or worsening.
- Look only where visible. In good light, observe the ear flap and canal entrance without inserting an object.
- Describe material. Note the amount, color, moisture, and texture of visible wax or discharge without guessing the diagnosis.
- Track behavior. Record scratching, rubbing, head shaking, sensitivity, sleep disruption, or reluctance to chew.
- Check recent events. Include bathing, swimming, grooming, travel, new skin problems, foreign-body exposure, and recently used products.
- Take a clear photo. A well-lit image of the outer ear may help show change over time, but it cannot replace an internal examination.
Avoid repeatedly opening, squeezing, or smelling a painful ear. One calm observation is more useful than an inspection that increases inflammation or fear.
Decide whether to clean or wait
Cleaning may be reasonable only when a veterinarian has already recommended a specific routine for this pet, the ear is comfortable, the eardrum is known to be intact when relevant, and the current findings match the circumstances covered by that plan.
Wait for veterinary advice when this is the first abnormal episode, symptoms are painful or pronounced, the type of discharge has changed, a product caused a reaction, prior treatment did not work, or you do not know whether the eardrum is intact.
Cleaning before an appointment can remove material the veterinary team may want to examine under a microscope. Ask the clinic whether they want the ear left untreated and uncleaned before the visit.
Follow a veterinarian-approved cleaning routine
If a veterinarian has confirmed that home cleaning is appropriate, use only the named product, amount, frequency, and technique for the individual pet. Read the label each time and check that the product has not expired or changed appearance.
- Work in an easy-to-clean, nonslip area and wear clothing that can get wet.
- Have gauze or soft cotton pads ready for the visible outer ear.
- Keep the bottle tip from touching skin or the ear canal.
- Apply the cleaner only as directed; do not force a nozzle deep into the canal.
- Massage only if the veterinarian’s technique calls for it and the pet remains comfortable.
- Allow the pet to shake in a safe space.
- Wipe material brought to the outer, visible area without probing inward.
- Stop and call the clinic if pain, bleeding, dizziness, or a new reaction occurs.
Avoid common ear-care mistakes
- Do not insert cotton swabs, tweezers, fingers, or camera tools into the canal.
- Do not use leftover prescription drops from another episode or another animal.
- Do not mix household acids, alcohol, peroxide, oils, or herbal products unless the treating veterinarian specifically prescribed that formula.
- Do not assume dark material always means mites or that a sweet smell proves yeast.
- Do not pluck ear hair or remove a suspected foreign object without professional instruction.
- Do not continue a product that causes obvious pain, redness, swelling, or neurologic signs.
Some products can irritate inflamed tissue, interact with other treatment, or be unsafe when the eardrum is damaged. “Natural” does not mean appropriate for an ear canal.
Prepare for a veterinary appointment
Bring the observation record, photos, product bottles, medication list, and relevant medical history. Tell the team about allergies, skin disease, swimming, grooming, prior ear cultures or tests, previous treatments, and the pet’s response.
A veterinarian may need to view the canal and eardrum, examine a sample, or recommend other tests depending on the findings. Recurrent problems often require investigation of an underlying factor rather than repeated cleaning alone.
When comparing clinics, ask whether they routinely evaluate the species, can perform ear cytology or other indicated testing, explain home-care technique, and offer a follow-up plan. Directory listings and reviews can help create a shortlist but do not establish clinical suitability.
Ear-odor checklist
- Compare the left and right ears
- Record onset, odor change, and visible discharge
- Note scratching, head shaking, pain, and balance changes
- List recent swimming, bathing, grooming, and products
- Keep objects and unapproved liquids out of the canal
- Ask whether to leave the ear uncleaned before the visit
- Bring product labels and medication history
- Follow only the individual veterinary cleaning plan
Limitations and important notes
A photo, smell description, or home otoscope cannot reliably establish the condition of the full canal or eardrum. Remote advice also cannot determine whether infection, inflammation, a foreign object, a mass, parasites, or another problem is present.
Ear care can be painful and behavior may escalate quickly. Protect people and the pet by stopping rather than using force. Ask the veterinary team about fear-reducing visit preparation when handling is difficult; give calming medication only when prescribed for that individual animal.
Sources and evidence notes
This article follows broad veterinary safety principles: symptoms with many possible causes require examination, painful ears should not be blindly treated, the eardrum affects product safety, and material may need diagnostic evaluation. The treating veterinarian’s current instructions and the labeled directions for an approved product are the appropriate sources for an individual cleaning plan.
Frequently asked questions
Does a smelly ear always mean an infection?
No. Infection is one possibility, but moisture, wax, inflammation, parasites, foreign material, wounds, and other conditions may also contribute. An examination and sometimes a sample are needed to distinguish causes.
Should I clean my pet’s ears before the veterinary visit?
Ask the clinic first. Cleaning can remove discharge that may be useful for examination or testing. If the clinic wants you to clean for comfort or safety, follow its exact instructions.
Can I use the same ear cleaner for my dog and cat?
Do not assume a product is suitable across species or conditions. Confirm the product and technique with a veterinarian for each pet, especially when an ear is already abnormal.
Why does the odor return after cleaning?
Cleaning removes material but may not address the underlying cause. Recurrence can mean the ear needs reassessment, testing, treatment review, or investigation of factors such as skin disease or anatomy.
Conclusion and next steps
Treat a new ear odor as information to investigate. First check for pain, discharge, swelling, behavioral change, and balance signs; then record recent events and contact a veterinary clinic when the ear is abnormal. Clean only under an established, current plan for that pet. Prompt evaluation is safer than guessing at a cause or trying leftover products.



 Southborough Veterinary Hospital4.0 (166 reviews)
 Wales Animal Clinic4.0 (118 reviews)
 Pawlicious Cookies5.0 (68 reviews)
 Roeder's Ark Veterinary Hospital4.0 (156 reviews)
 Veterinary Urgent Care4.0 (271 reviews)
 Windhorse Veterinary Acupuncture5.0 (7 reviews)
 Expert Advice on Pet Diseases: How to Keep Your Pets Healthy and Happy
 How to Stop a Cat From Scratching the Couch with Furniture Protectors & Scratch Pads
 How to Prevent Tick-Borne Diseases in Cats: A Comprehensive Guide
 The Ultimate Guide to Pet Adoption: What Every Future Pet Parent Should Know
 Understanding Pet Allergies: Symptoms and Treatment Options | Brothers Pets
 What to Know Before Choosing a Grain-Free Pet Food